Defendry Security Suite User Guide
This guide will help you set up and maintain your Defendry Security Suite.

Welcome!
Thanks for choosing the Defendry Security Suite to better protect your people.
This guide will help you install, configure, and maintain your system.
If you ever need help beyond what is provided in this guide, please contact your Defendry representative or send us a message. We’d love to help.
Table of Contents


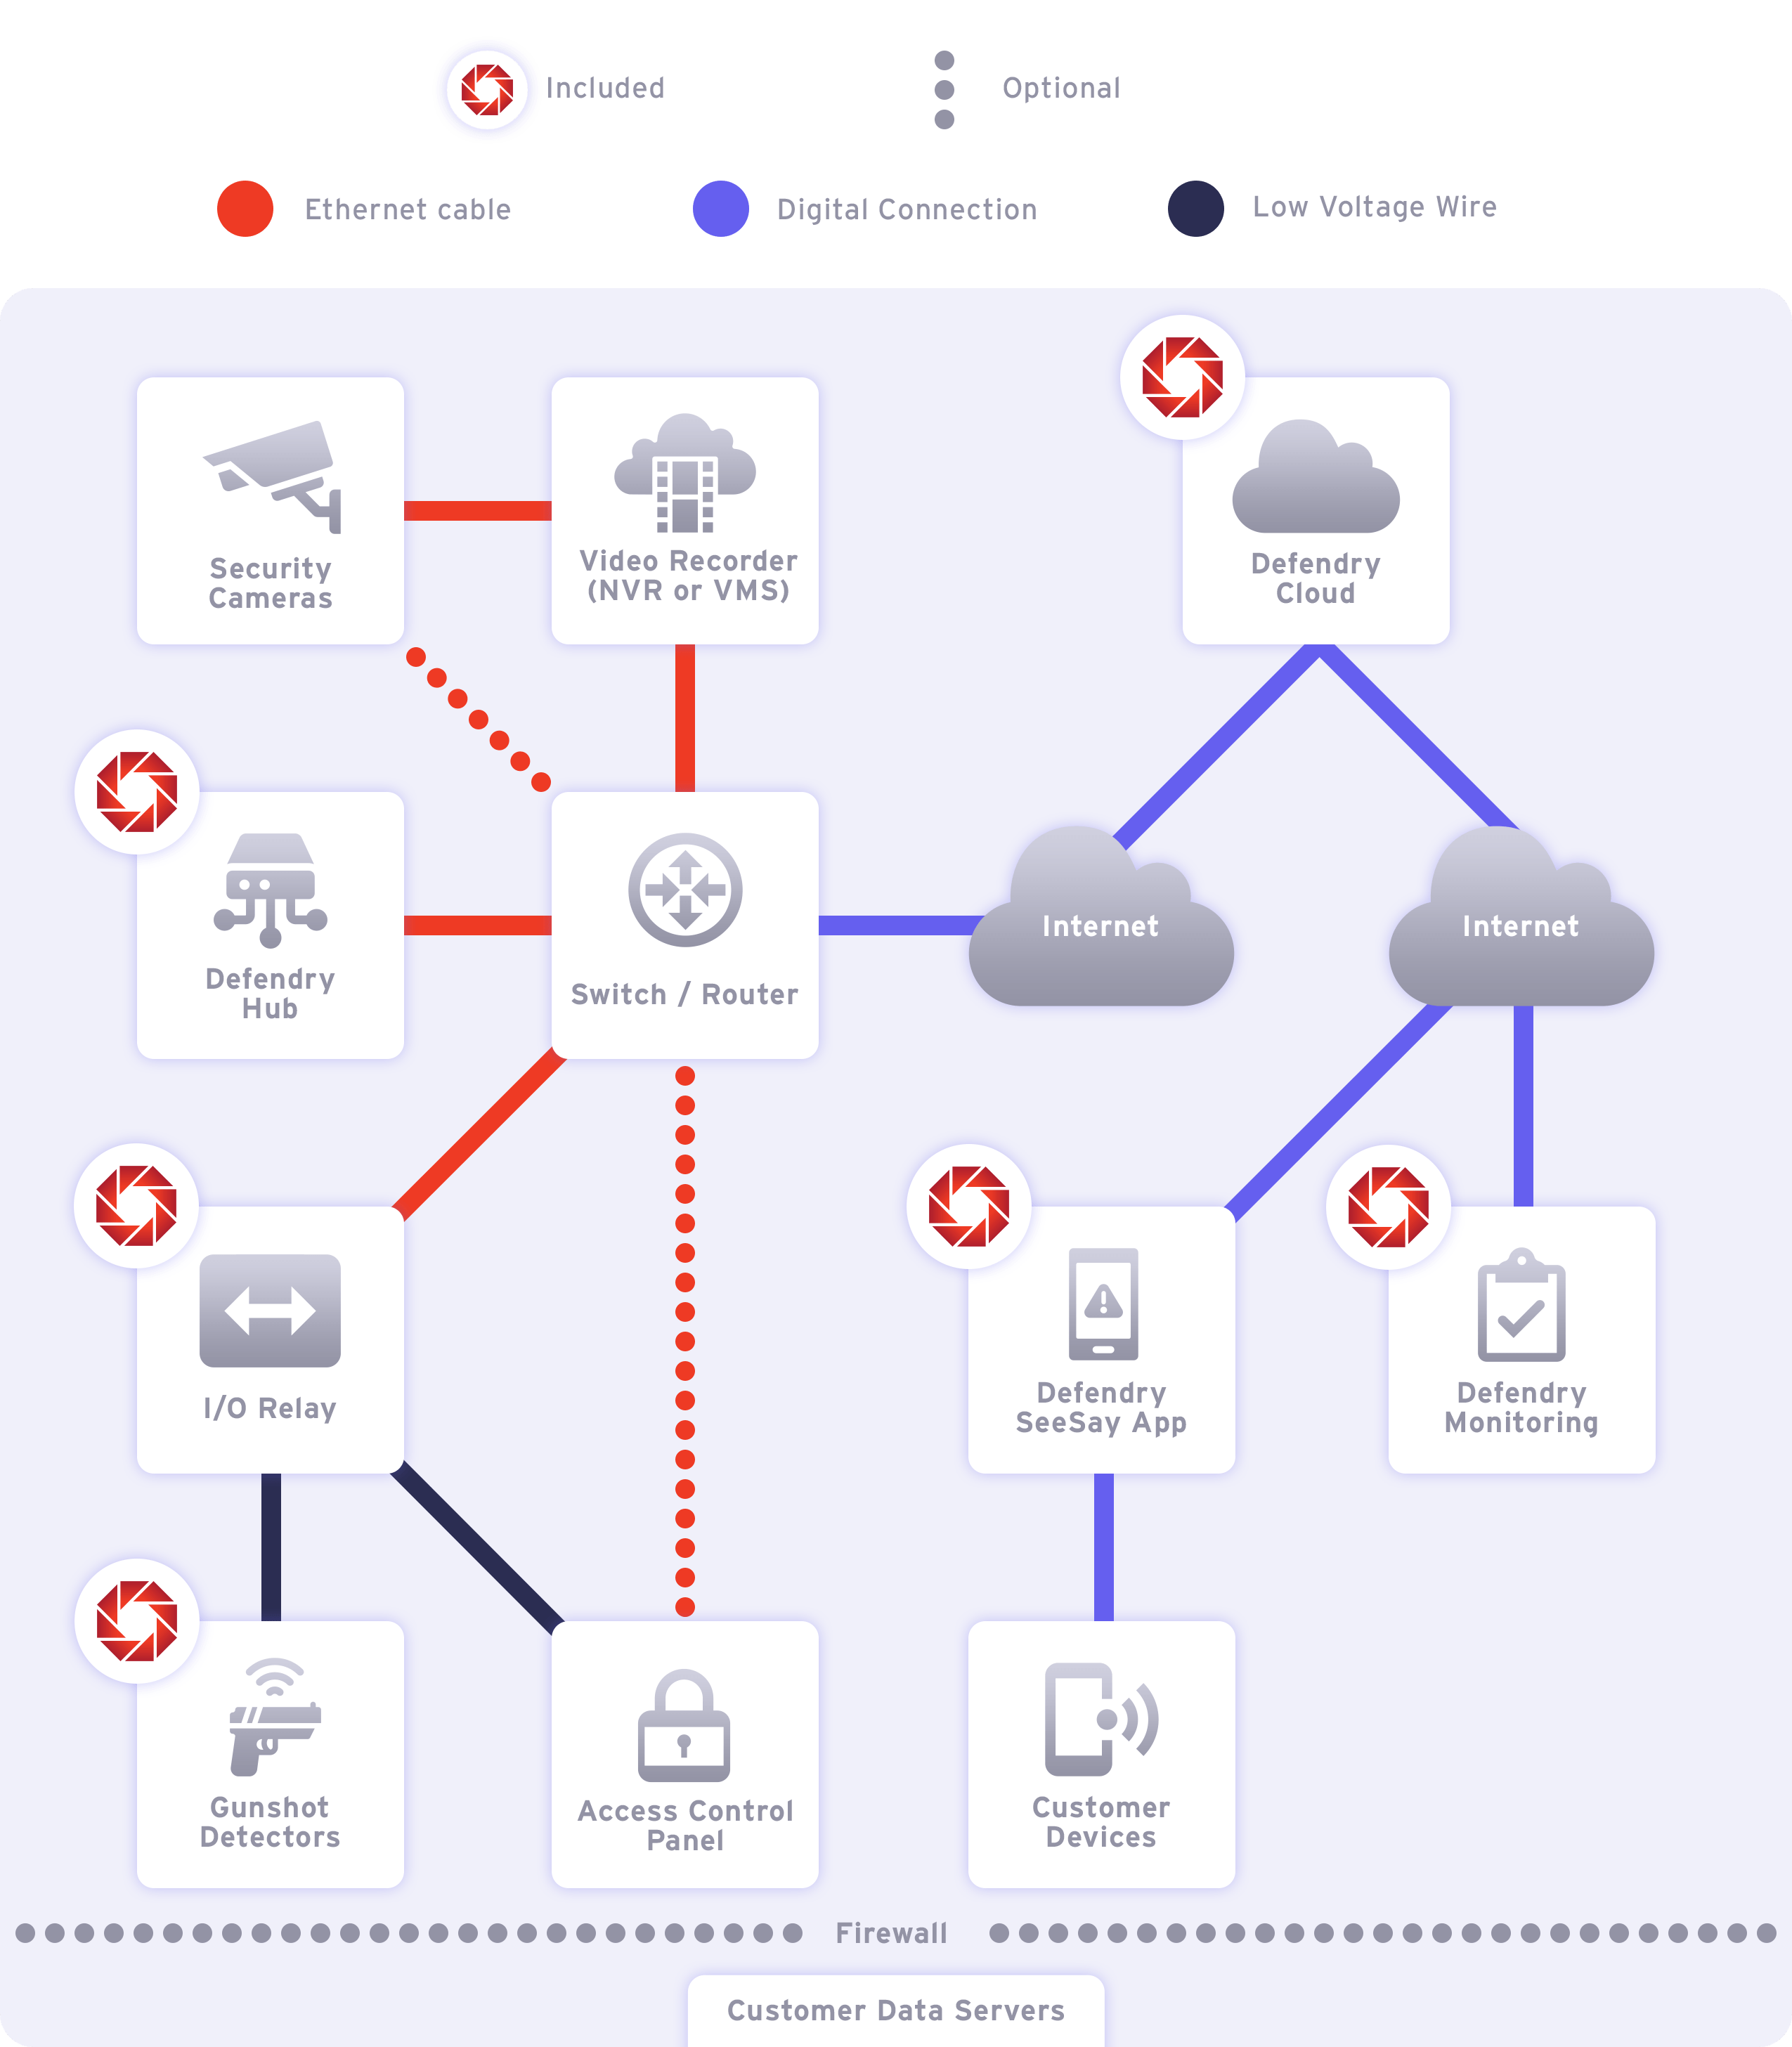
Integration Map

Requirements

Security Cameras
REQUIRED FOR
- Visual Threat Detection
- EyesOn
COMPATIBILITY
- Required:
- RTSP streaming capable
- ONVIF compatible — only required for Visual Threat Detection
RESOLUTION
- For Visual Threat Detection:
- Large Spaces* — 8MP (4k) resolution
- EXCEPTION: 4MP or 1080p cameras can be utilized in large spaces where long-distance detection is not required.
- Small Spaces* — 4MP or 1080p resolution
- Large Spaces* — 8MP (4k) resolution
*To determine your distance(s) of detection needed, see the Security Camera Setup Guide.
- For EyesOn:
- Use your existing RTSP cameras. Plus, add additional inexpensive cameras for maximized coverage (recommended).
FIELD OF VIEW (FOV)
- Recommended: 70° optical FOV (see Setup Guide > Security Cameras > Field of View for detailed use case descriptions.)
NIGHTTIME/LOW-LIGHT DETECTION
- Required:
- Security Cameras must be able to retain a 1/500th-second shutter speed in both daytime and nighttime to ensure that non-blurry surveillance video is captured that is capable of being analyzed.
- Ensure that the space monitored by cameras has sufficient lighting for low-light scenarios.
- Recommended: For optimal performance, choose a camera that is optimized for capturing low light scenarios with high-ISO/low-grain capability built-in.
- NOTE: IR mode is currently not supported.

Video Recorder
USED FOR
- Visual Threat Detection – REQUIRED
- EyesOn – OPTIONAL
STORAGE
- Required:
- Onsite NVR or VMS
- For Visual Threat Detection, Defendry requires surveillance video to be recorded by an onsite Network Video Recorder (NVR) or Video Management System (VMS) for liability purposes. In case an incident occurs, this ensures that the video can be viewed afterward.
- Cloud-based systems cannot be substituted for a physical video recorder because they can miss critical incidents during network interruptions and most often destructively reduce video quality.
- 7 days of recorded video minimum must be saved at all times.
- Onsite NVR or VMS
COMPATIBILITY
- Option 1: An ONVIF-compatible Video Recorder is required if your RTSP video streams are sent through the Video Recorder to the Defendry Hub (as shown on the Integration Map).
- Option 2: A non-ONVIF-compatible Video Recorder may be used if your RTSP video streams are sent through the Switch/Router(s) to the Defendry Hub and Video Recorder individually. (This configuration is not shown on the Integration Map.)

Switch/Router
USED FOR
- Visual Threat Detection
- Gunshot Detection
- Access Control System Integration
- Rapid Response Monitoring
- EyesOn
SPECIFICATIONS
- Required: Minimum of 2 available ethernet ports
- EXCEPTION: If you will be connecting your Defendry Hub to your Access Control Panel, a third port is needed.

Defendry Hub
(formerly named "Defendry Appliance")
USED FOR
- Visual Threat Detection
- Gunshot Detection
- Access Control System Integration
- Rapid Response Monitoring
- EyesOn
PHYSICAL SPACE
- The size and number of Defendry Hubs provided depends on the number of locations and cameras monitored and the components being used.
- When Visual Threat Detection is enabled, an appropriately-sized Hub(s) will be provided based on the number of cameras monitored:
- Small: Approximately 14″ (W) x 3.5″ (H) x 12″ (D). It can support up to eight (8) 8MP cameras per appliance.*
- Medium: Approximately 17″ (W) x 7″ (H) x 17″ (D) and can be supplied with a rack mount kit if desired. It can support up to sixteen (16) 8MP cameras per appliance.*
- Large: Approximately 17″ (W) x 7″ (H) x 23” (D) in 4U rack mount form. It can support up to thirty-two (32) 8MP cameras per appliance.*
- *NOTE: 8MP camera streams can be substituted for up to four (4) 1080p camera streams or two (2) 4MP camera streams.
- When Visual Threat Detection is NOT enabled, a small-sized Hub will be provided.
- Small: Approximately 14″ (W) x 3.5″ (H) x 12″ (D).
- When Visual Threat Detection is enabled, an appropriately-sized Hub(s) will be provided based on the number of cameras monitored:

Access Control Panel
USED FOR
- Access Control System Integration
CONNECTIVITY
- Required: Wired connection
- Because wireless systems rely on signals that can be slow, interfered with, or inadvertently shut off, a wired connection to access-controlled doors is required.
- Option 1: Connect your Defendry Hub to your Access Control Panel or door locks via an I/O Relay (dry relay switch), which will be provided by Defendry if preferred.
- Option 2: Connect your Defendry Hub to your Access Control Panel via API through ethernet cables.
- Because wireless systems rely on signals that can be slow, interfered with, or inadvertently shut off, a wired connection to access-controlled doors is required.

Internet
USED FOR
- Visual Threat Detection
- Gunshot Detection
- Access Control System Integration
- Rapid Response Monitoring
- EyesOn
BANDWIDTH
- Required: minimum of 10 Mbps bandwidth
- Your Defendry Hub uses only tiny amounts of internet bandwidth under normal circumstances, and small amounts of bandwidth in short bursts during an incident as still detection images are uploaded.
- NOTE: Your Defendry Hub will not stream video to the cloud.
CONFIGURATION
- Outbound Ports: One (1) outbound access port 443 (the standard HTTPS port) is required. Additional ports may be necessary in some circumstances.
- Network Access: Other than surveillance video streams (which can be separated from normal network traffic), Defendry does not require access to any resources inside a customer’s firewall.
- EXCEPTION: If a customer wants Defendry to connect to the Access Control Panel via API rather than I/O Relay, access to the server that would receive the API calls is needed.
- For maximum security, a firewall that separates your security surveillance system and Defendry Appliance from any business-related computer systems is recommended, but not required.
- Network Connection: Wired or 4G wireless
- If a 4G wireless connection is desired, Defendry can provide a 4G wireless modem at an additional cost.
Defendry SeeSay App
USED FOR
- Visual Threat Detection
- Gunshot Detection
- Rapid Response Monitoring
- EyesOn
COMPATIBILITY
- The Defendry SeeSay app is available for Apple and Android mobile phones.
- NOTE: For install and setup instructions, please see the Defendry SeeSay Setup Guide.
API Integrations
Optional
USED FOR
- Access Control System Integration – OPTIONAL
- You can optionally connect your Access Control system to the Defendry Hub via API instead of via I/O Relay. See Access Control Panel Setup Guide for instructions.
- EyesOn, Visual Threat Detection, Gunshot Detection, Rapid Response Monitoring – OPTIONAL
- To send images and event information (all threat alert notification text that would otherwise be sent to the Defendry SeeSay app) to your own emergency management system, request access to our API from your Defendry Representative.

Setup Guide
Security Cameras
Security Cameras provide live video feeds that are analyzed by your Defendry Appliance for threats including guns, masks, and intruders.
To set up your Security Cameras:
1. DETERMINE CAMERA PLACEMENT
- Gun, Mask, & Intruder Detection — Cameras used for gun, mask, and intruder detection can be placed outdoors and/or indoors and should be mounted between 8-24 feet above ground level.
- Watchlist Detection — Cameras used for Watchlist detection can be placed outdoors and/or indoors and should be mounted so that the line of sight is a maximum of 10 degrees (°) above the average human eye level, 57 inches.
- Watchlist detections require a direct line of sight to detect the front of a human’s face, so optimal performance will result when a camera is placed nearest to eye level, or slightly above.

- Line of Sight — Place cameras where the line of sight into the area to be monitored is most free of obstructions like trees, walls, etc.
- Distance — Place cameras within the maximum detection distances for the desired threat types as specified in the chart below.

2. SET FIELD OF VIEW (FOV)
- Recommended: For maximizing the width of coverage and distance of detection, we recommend that you set your camera’s optical FOV to 70°.
- ALTERNATE FOV CONSIDERATIONS: Your Defendry Hub can detect threats using an FOV that is greater or less than 70 degrees. However, threats will not be able to be detected at the same distances. For smaller FOVs, threats can be detected further away, but the width of coverage will be smaller. For larger FOVs, threats can only be detected at shorter distances, but the width of coverage will be larger. For example, an 8MP camera with a 70° FOV can detect pistols up to 22 feet and rifles up to 45 feet, whereas an 8MP camera with a 102° FOV can detect pistols only up to 15 feet and rifles at up to 31 feet.
- DIGITAL ZOOM RESTRICTIONS: Digital zoom-in does not produce accurate optical FOV adjustments that will increase the distance of detection because it crops pixels. Defendry requires the highest pixel density possible per frame dimensions to maximize the distance of detection; cropping pixels off will only reduce the width of coverage and will not increase the distance of detection.
3. INTEGRATE
- Connect your Security Cameras to your Video Recorder (if not already connected).
- Option 1: Connect your Security Cameras directly to your Video Recorder. Use ethernet cable.
- Option 2: Connect your Security Cameras to your Switch/Router, which will later be connected to your Video Recorder. Use ethernet cable.
- Enable RTSP streaming (if not already enabled) for each Security Camera.
- Provide each camera’s streaming URL to your Defendry Representative so the video streams can be properly configured.
Video Recorder
Defendry requires surveillance video to be recorded by a Network Video Recorder (NVR) or Video Management System (VMS) for liability purposes. In case an incident occurs, this ensures that the video can be viewed afterward.
To set up your Video Recorder:
INTEGRATE
- Connect your Video Recorder to your Switch/Router (if not already connected) using an ethernet cable.
Switch/Router
A Switch/Router connects your Video Recorder, Defendry Hub, I/O Relay, and Access Control Panel to each other and to the Internet so that detections can be sent to the Defendry Cloud and Defendry Human Monitoring agents can interact with the Access Control Panel.
To set up your Switch/Router:
INTEGRATE
- Connect your Switch/Router to your Defendry Hub using an ethernet cable.
- NOTE: To keep your security surveillance system and Defendry Hub separate from any business-related computer systems for added security, a firewall is recommended, but not required.
- If enabling automatic lockdown capabilities, connect the Switch/Router to the I/O Relay &/or Access Control Panel using an ethernet cable.
Defendry Hub
(formerly named "Defendry Appliance")
Cloud computational power is too slow to process the AI software that is necessary to quickly and reliably detect threats, so an on-site appliance is needed.
The Defendry Hub is a specialty appliance with up to 32 CPU cores, a GPU bank, and as many as 11.5k Nvidia Cuda Cores, which enable the proprietary neural network inference engine to look for threats by analyzing live surveillance video.
To set up your Defendry Hub:
INTEGRATE
- Connect your Defendry Hub(s) to your Switch/Router using an ethernet cable.
- Plug in your Defendry Hub(s) to your power source and turn your Defendry Hub(s) on.
Access Control Panel
An Access Control Panel enables Defendry to automatically lockdown your facility. Defendry can integrate with an Access Control Panel either via an I/O Relay (dry relay switch) or through an API.
To set up your Access Control Panel:
INTEGRATE
- Option 1: Connect your Access Control Panel to your Switch/Router via an I/O Relay (dry relay switch) provided by Defendry.
- Connect your Access Control Panel to the I/O Relay via low voltage wiring.
- Connect the I/O Relay to your Switch/Router via an ethernet cable.
- Option 2: Connect your Access Control Panel to your Defendry Hub via API with an ethernet cable connection to your access control software.
- Please contact your Defendry representative to receive specific instructions for connecting your system.

I/O Relay
For setup instructions, see the Access Control Panel section above.

Gunshot Sensors
Defendry Gunshot Sensors can reliably detect gunshots indoors or outdoors.
To set up your Gunshot Sensors account:
INTEGRATE
- Attach to the ceiling in the center of the room, on a flat surface.
- Keep out of reach of persons to minimize tampering with, damaging or activating to unit.
- Each indoor sensor can detect small arms fire in a room up to 2500 square feet.
- Note: As the ceiling height is lowered, the floor space increases, enabling a larger than stated detection range.
- Physical :
- Mounts on ceiling; looks like a smoke detector.
- Indicators: Power and status indicators to provide basic visual feedback.
- Connections: Power (+9V ~ +60V), Ground, Physical contact closure referenced to ground. (POE power accepted); pins 4, 5 = (+); pins 7,8 = (-).
- Mounts on ceiling; looks like a smoke detector.
- Display:
- Red LED indicating the module is in alert status.
- Signal: This display will provide subtle indication when the unit is activated and when help is on the way by short LED flashes.
- Alerting:
- Single gunshot detected and alerted by an open collector output to the building’s existing alarm panel.
- Multiple gunshot detected and alerted by an open collector output to the building’s existing alarm panel.
- Manual pull switch detected and alerted by an open collector output to the building’s existing alarm panel.
- Alerts are sent to the building’s alarm panel, which alerts the security system manager to the detected gunfire.
- The user must either manually reset the device or cycle power to the device to cancel the alert.
- The LED will flash faster when in alert mode, indicating that the sensor has been activated. Unit can be configured to either emit a beeping tone when activated, or can be configured as a silent alarm.
- Power:
- Input: +9V ~ +60V input from the alarm wiring external power.
- Battery: 500mA/hour long life LiPo battery. Battery recharged from the module’s external power.
- Operation Life:
- 4-hour operation without AC power applied (depending on radio broadcasts).
- Contact Closure:
- Separate outputs for single gunshot, multiple gunshots, and manual pull-down switch. ▪ Output is closed to ground when activated.
- Tampering:
- Unit can be configured to provide a user specific load resistor to alert the alarm panel if a cable cut event happens or if tampering has occurred.
- Screw terminal to enable a user specific axial resistor.
- Output provided for tamper detection when unit is removed from the mounting bracket.

Defendry Cloud
The Defendry Cloud is the center of Defendry communications. It manages incident alerts for the Defendry SeeSay mobile app, provides a gateway for the Defendry Hub(s) to report threats to human monitoring agents, and monitors the health status(es) of and provides updates to the Defendry Hub(s) and other connected devices.
To set up your Defendry Cloud account:
INTEGRATE
- Follow the customized instructions provided by your Defendry Representative.

Defendry Human Monitoring
Defendry has partnered with the premiere 24/7 human monitoring center, Rapid Response Monitoring, Inc. Agents at the location nearest your building will review detected threats 24/7 to prevent &/or reverse false alarms and verify real threats.
To set up your Defendry Human Monitoring account:
INTEGRATE
- Follow the customized instructions provided by your Defendry Representative.
Defendry SeeSay App - for ADMIN Users
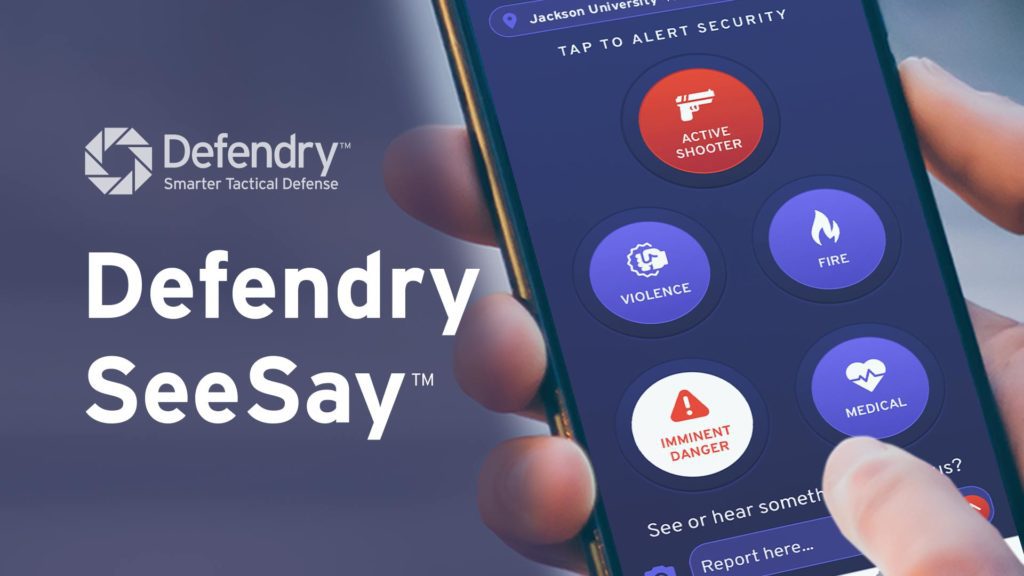 The Defendry SeeSay app delivers emergency alerts and provides a way for Anonymous users to report tips and panic button alerts directly to your security team.
To set up your Defendry SeeSay app as an Admin user:
1. DETERMINE USER ROLES
- Determine user roles for your team.
- Admin: Admin users can receive alerts, invite new Anonymous users, and receive & respond to submitted Tips and Panic Button presses by Anonymous users.*
- BEST PRACTICE: Add your security team and any administrators that you want to receive admin-only emergency alerts, anonymous Tips, and Panic Button presses as Admin users.
- *NOTE: If desired, Admin permissions can be customized by requesting it from your Defendry Representative.
- Anonymous: Anonymous users can receive alerts as well as submit potential threat Tips to Admin users.
- BEST PRACTICE: Add everyone else you want to receive regular emergency alerts and be able to submit anonymous Tips and Panic Button alerts to Admin users.
- Admin: Admin users can receive alerts, invite new Anonymous users, and receive & respond to submitted Tips and Panic Button presses by Anonymous users.*
- If you have not already, request Admin user accounts to be created by providing your Defendry Representative with the details they requested from you.
2. DOWNLOAD APP
- Invite all Admin users to download the Defendry SeeSay app.
- Follow the instructions provided by your Defendry Representative to install the app.
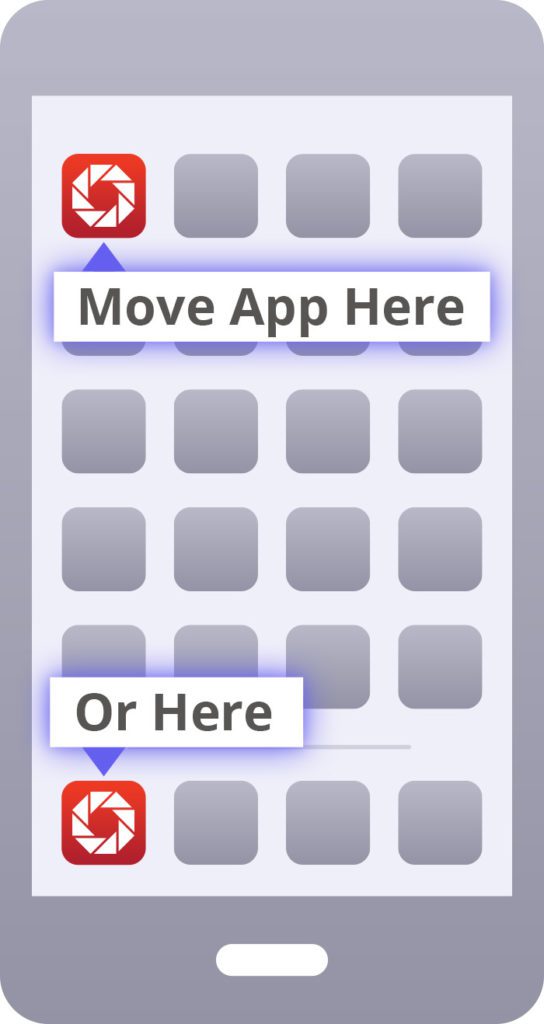
3. MOVE SEESAY TO YOUR PHONE’S HOMESCREEN
- To make sure that the app is in the fastest, easiest place to find during an emergency, move the app to the top, left corner of your phone’s homescreen or to your app’s favorite apps list.
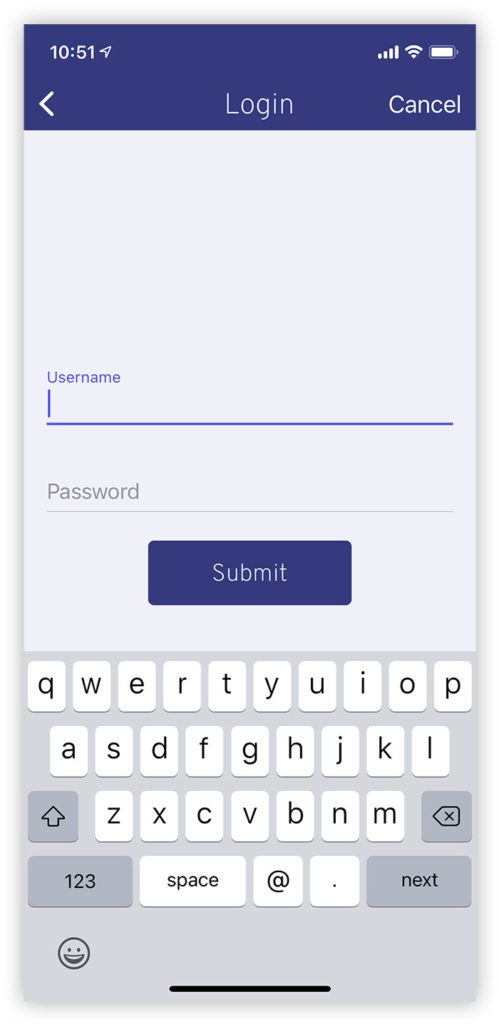
4. LOGIN
- Open your SeeSay app. Next, tap the “Login” button on the bottom of the screen. Enter the login credentials provided by your Defendry Representative. Then tap “Submit”.
5. ENABLE PERMISSIONS
- When prompted to do so, allow the following permissions on your phone so that SeeSay emergency features will work:
- Location Services — This enables your security team and law enforcement to know where you are at if you press a Panic Button.
- Notifications — This enables you to be notified with push notifications during an emergency.
- Critical Alerts (iPhone users only) — This enables your phone to alert you with a loud emergency alarm just like Amber Alerts, Tornado Alerts, etc.
- Camera — This enables you to use your camera to send pictures of a threat to your security team.
- Photos — This enables you to access photos on your phone to send pictures of a threat to your security team.
- If you accidentally skipped or did not properly enable these services, you can also change them in your phone’s settings.
6. INVITE ANONYMOUS USERS
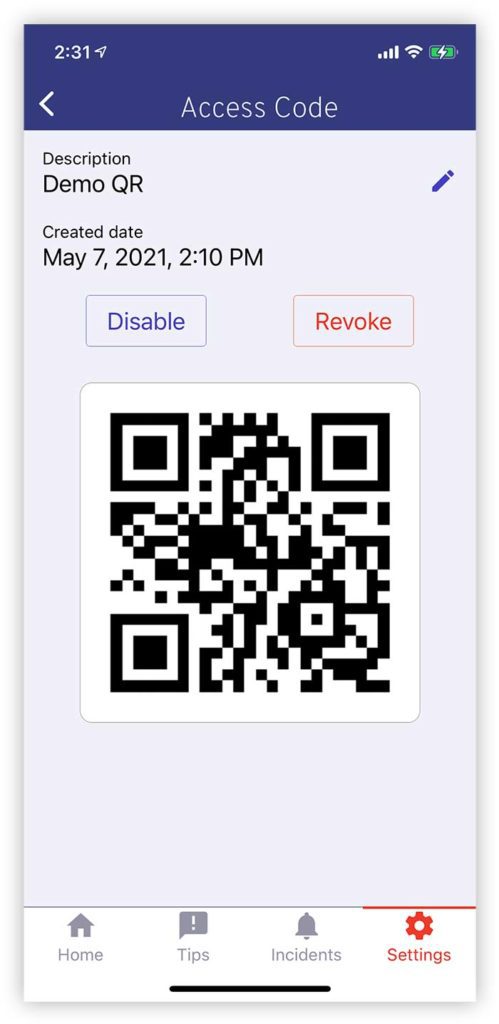
- Generate a QR Code invitation.
- Navigate to Settings > Locations > [Your Location Name]
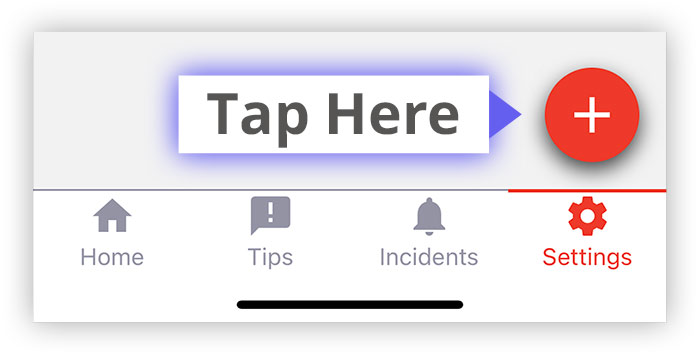
- Tap the red “Add” button to create a new “Access Code” that will generate a sharable QR code for inviting users to join your Location anonymously.
- Share the QR code with anyone to invite them to join your Defendry SeeSay Location as an Anonymous user. Plus, provide setup instructions by also sending them this Setup Guide link.
- BEST PRACTICE: Take a screenshot of the QR code and send the image to people however you want.
7. START USING SEESAY
- You’re all set! We highly recommend incorporating the Defendry SeeSay app into your emergency planning and drills. For recommendations, see Ongoing Best Practices.
Defendry SeeSay App - for ANONYMOUS Users
Provide setup instructions to invited Anonynous users by sending them this link.

AI Install Training
To maximize detection accuracy, Defendry’s AI needs to be custom-configured and fine-tuned to recognize threats in the environment it monitors for roughly 2-3 weeks prior to deployment.
To begin your training period:
1. VERIFY CONFIGURATION
- Follow instructions provided by your Defendry Representative to ensure all components of your Defendry Visual Threat Detection system are installed correctly.
2. PERFORM INITIAL TEST
- Follow instructions provided by your Defendry Representative to hold a fake, orange, rubber gun in various positions in areas monitored by your Defendry system so that the system can practice recognizing guns in your location.
- Wait 1-2 weeks, or as instructed by your Defendry Representative. During this time, the Defendry team will identify any necessary camera configuration optimizations and/or further train your AI model to more accurately recognize any anomalies.
3. PERFORM FINAL TEST
- Follow instructions provided by your Defendry Representative to again hold a fake, orange, rubber gun in various positions in areas monitored by your Defendry Hub to verify that gun detection is working properly.

Ongoing Best Practices
We hope that you never experience an incident in which your Defendry Visual Threat Detection system is needed. However, much like practicing fire drills to be prepared in case of the worst, active shooter training and drills are highly recommended, and in some cases required by law.
To ensure that your team knows how to use Defendry during an emergency, we highly recommend incorporating your Defendry system into periodic safety training and drills. Greater repetition can help your team better remember what to do when they need it most.

Emergency Action Planning
PURPOSE
Plan for the worst, so that you’re ready just in case. The saying, “failing to plan is planning to fail,” is true of emergency planning.
WHAT TO DO
Determine what your team needs to do during an active shooting.
Be sure to plan emergency instructions that would be delivered to your people during an emergency via the Defendry SeeSay app, especially if your Location requires any special instructions. Provide these instructions to Rapid Response, Defendry’s 24/7 Human Verification Center, so that they can be sent to your people during an emergency.
RESOURCES
There are also many companies that offer emergency planning services.

Active Shooter Training
PURPOSE
Prepare for the worst, so that you’re ready just in case. Your teammates need to learn your emergency action plan.
WHAT TO DO
Teach your emergency action plan to your team to ensure that they know what to do during a real emergency.
RESOURCES
There are many companies that offer emergency training services. One of our favorites is Safehive.

Active Shooter Drills
PURPOSE
Practice your team’s response to worst-case scenarios, so that you’re ready just in case. It is well known that when a human feels that their life is in danger, their ability to perform is significantly inhibited, unless they have been intensely trained in how to respond.1
WHAT TO DO
SAFETY WARNING: DO NOT stage an active shooter drill that utilizes real or fake weapons until you receive written clearance from Defendry. If Defendry is not made aware, the police will respond as if it is a real active shooting, potentially resulting in anyone holding a gun being arrested or killed, your people’s safety being jeopardized, and your organization incurring large fines and lawsuits. Get written clearance from Defendry before performing an active shooter drill that utilizes real or fake weapons.
Practice your emergency action plan with staged active shooter scenarios to ensure that your team establishes the muscle memory needed to be able to act well during a real emergency.
RESOURCES
There are many companies that offer emergency training services.
__________
1 https://journals.sagepub.com/doi/full/10.1177/2158244016638708#abstract

